Article
Configuring Data Types
Keep your datasets clean, consistent, and ready for reliable statistical analysis.
Some analyses and settings depend on the data type of the column you want to analyze. For your convenience, QSuite natively supports several data types, which are automatically detected for each column when you import or paste your dataset. However, in some cases automatic detection may identify the wrong data type, particularly when it is ambiguous. With QSuite you can easily verify the detected data type and change it in a very simple way.
Viewing the Data Type
Each column displays an icon that indicates the detected data type. QSuite currently supports the following data types:
- Categorical: This data type is represented by the symbol "T". Categorical data is data on which arithmetic operations such as addition, subtraction, averages, etc. cannot be performed. This data represents labels or categories such as: colors, phone numbers, city, country, day of the week, unique identifier, etc.
- Integer: Represented by the symbol "123". Integer data is also known as count data and refers to values where a decimal point does not make sense. For example: number of accidents, number of non-conformances, number of people, etc.
- Decimal: Represented by the symbol "1.5". Examples of this data include sales, costs, time, and any other variable that can be expressed with a decimal point.
- Date: Represented by a calendar icon. QSuite supports several date formats and will attempt to identify the format your data uses. However, when the date format is ambiguous QSuite will mark the column with a question mark "?" so you can manually specify the correct date format.
- Time: This data format is represented by a clock icon.
The image below shows an example of the different icons representing each data type.
Changing the Data Type of a Column
To change the data type of a column, do the following:
- Click on the icon corresponding to the data type. A dropdown list will appear with the different options.
- Select the correct data type for your column from the list.

Working with Dates
Automatic Identification of Dates
QSuite will try to automatically identify the date format of your data. However, when your date is ambiguous a question mark will appear on the column icon.
To tell QSuite the date format of your data, follow these steps:
- Click on the question mark "?" on the column
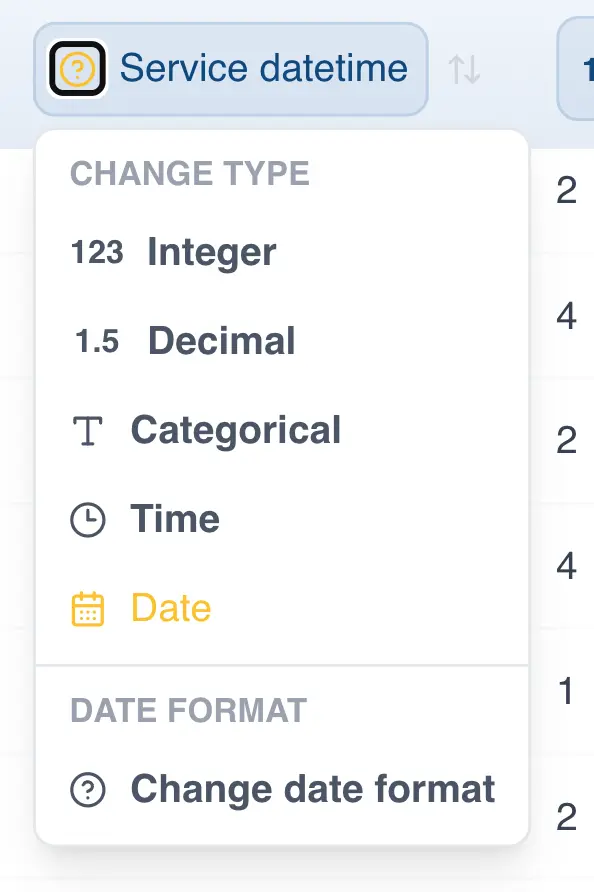
- Click on "Change date format". A dialog box will appear so you can specify the correct format.
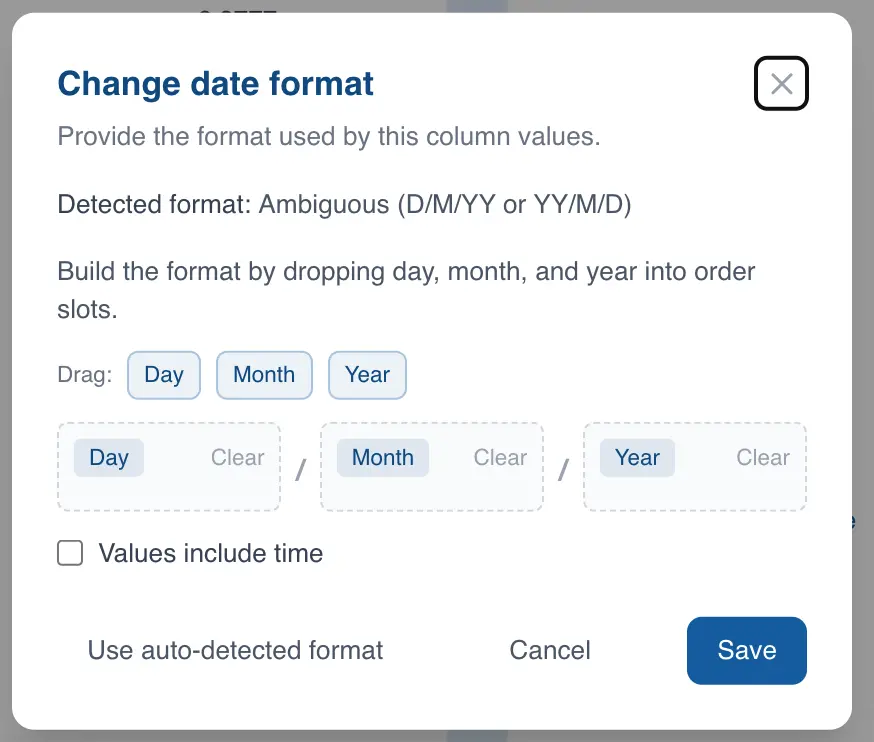
- Drag the "Day", "Month", and "Year" labels into the correct order. For example, if your date format is "mm/dd/yyyy", the correct order would be Month / Day / Year.
- Check the "Values include time" checkbox if the column combines both dates and times. Otherwise, leave it unchecked.
- Click Save.
If your data follows the date format you specified, QSuite will make the change automatically. Otherwise, an error message will appear indicating that one or more values do not match the specified date format.
Handling Date Formats When Importing from MS Excel
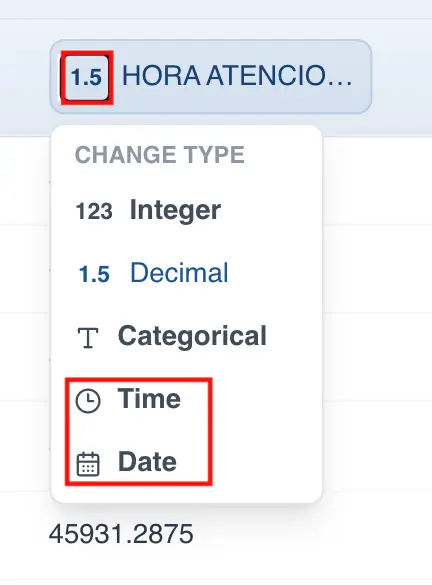
When importing data from MS Excel, date and time columns may show unexpected values. This is because MS Excel stores date formats as integers (for date-only values) or decimals (for date + time values), as shown in the image below:
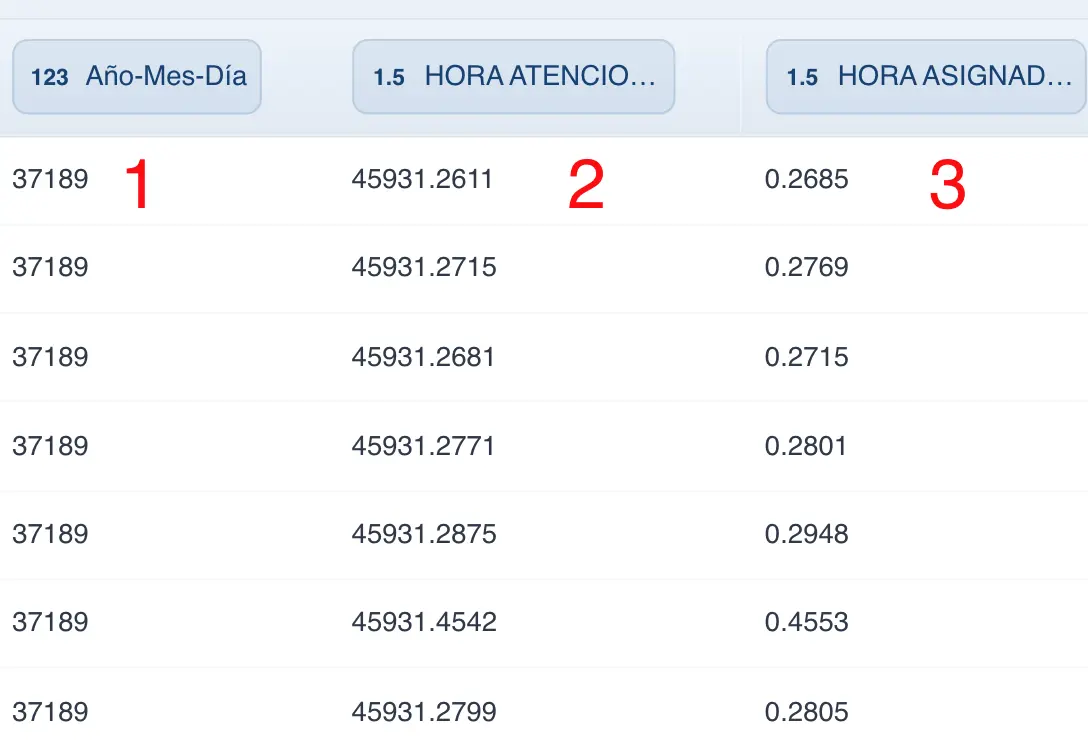
In the image above:
- Column 1 is a date column and displays as a sequence of integers
- Column 2 is a date and time column, but displays as decimal numbers
- Column 3 is time-only, but displays as decimal numbers less than 1
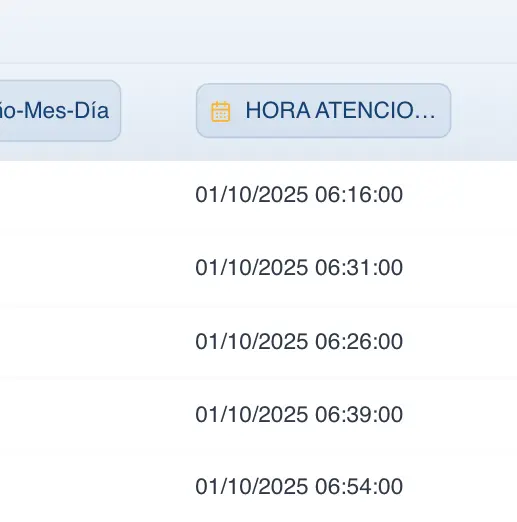
To display the dates instead of these numbers, follow these steps:
- Click on the column icon to open the options menu
- Select the date or time column type, as appropriate
- If you select the "date" option, a window will appear to select the format your dates are in
- Choose the correct date format for your data by dragging each component to its corresponding zone
- If your date column contains times, check the option that says "Values include time"
- Click Save to convert your data
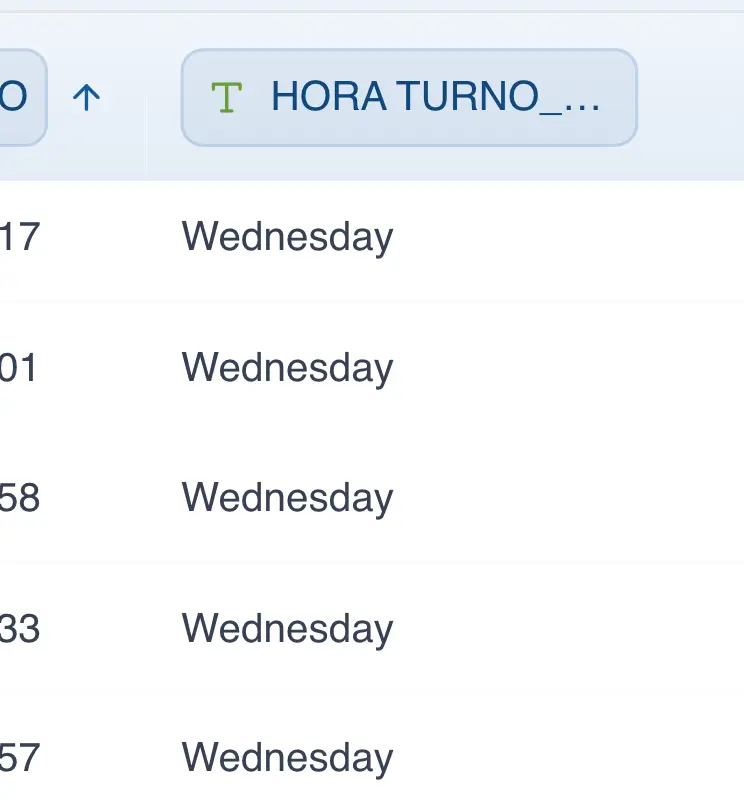
Extracting Date Components
In QSuite you can extract components or values from a date column. To do so, simply follow these steps:
- Right-click on a date column
- Hover over the option that says "Extract values"
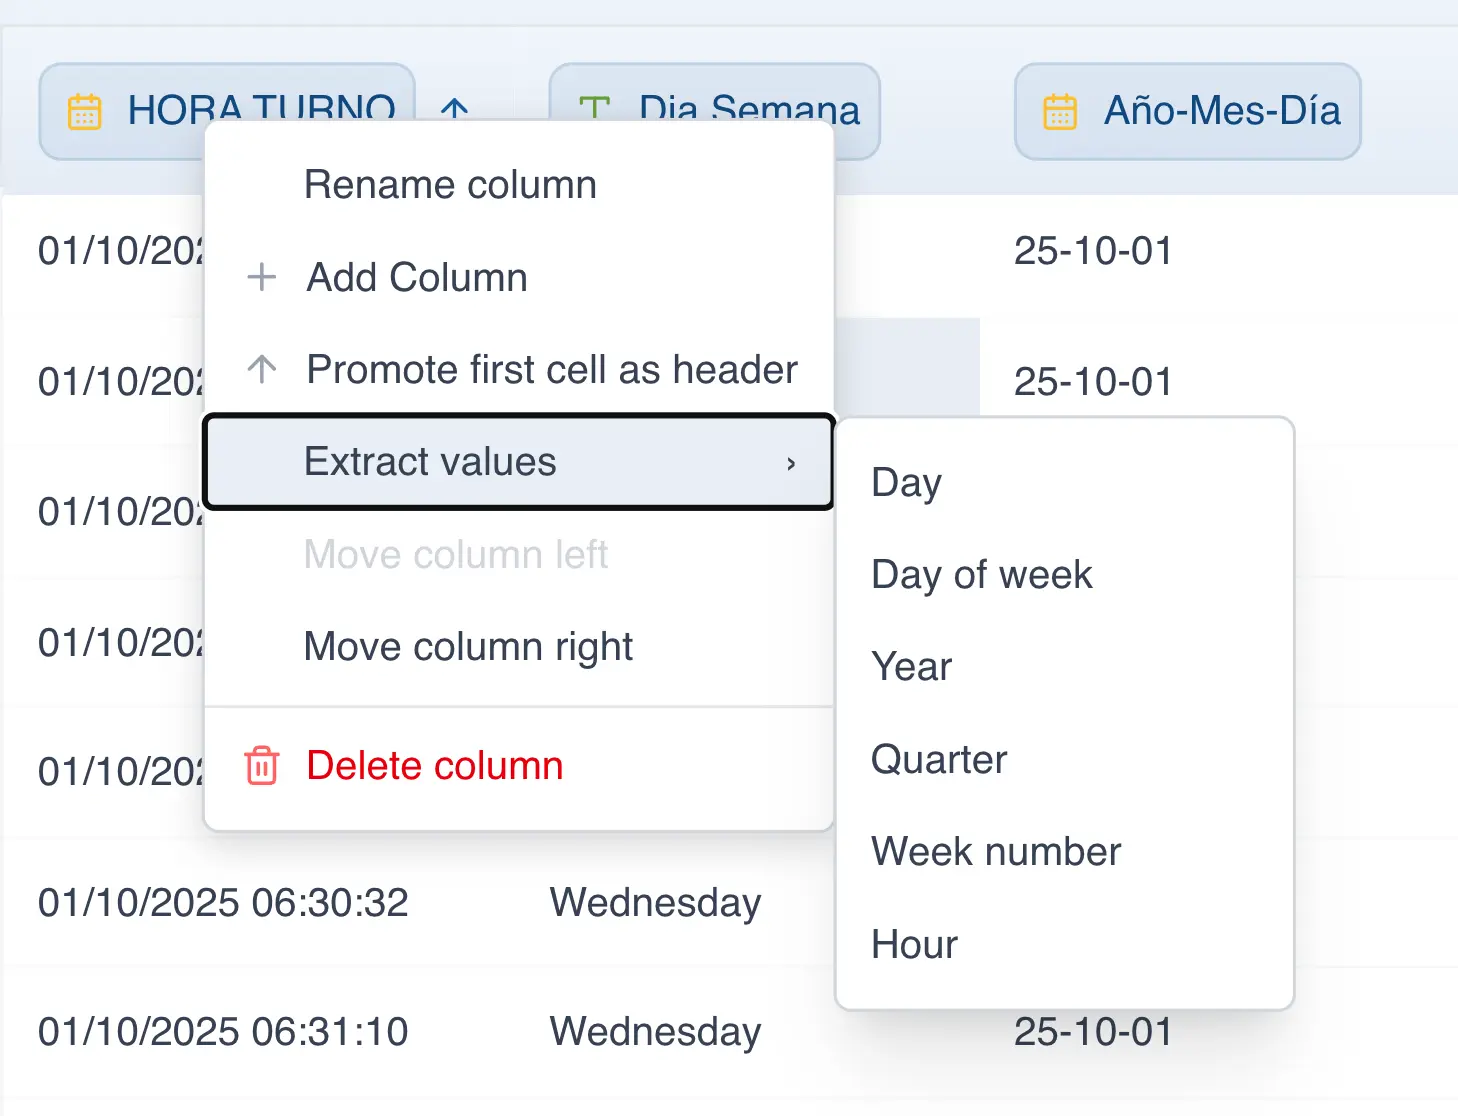
- Choose the date component you want to extract
When you click on one of the menu options, a new column will be created with the selected date component. The image below shows the result of clicking on the "Day of the week" option.